
Explore the Cities of Texas
The Lone Star State is truly in a class of its own, invoking some of the strongest characterizations in the union. As the home of an exceptionally proud and friendly populace, Texas is world-famous for its hearty welcoming spirit. Our 13 hotels carry the rich tradition of “Texas hospitality,” placing guests in the midst of the state’s biggest and brightest attractions. Use this reference guide to begin building your itinerary.

A leafy intellectual enclave lying well outside the realm of Lone Star stereotypes, Austin has been compared to Berkeley and Seattle, but it is at once its own place and entirely of Texas. Many Texans who live in faster-paced cities like Dallas or Houston dream of someday escaping to Austin, which, although it’s passed the half-million population mark within its city limits alone, still has a small-town feel.
Austin
Welcome to Austin, Texas, a high-tech hotspot with a rich cultural heritage as the “Live Music Capital of the World.” Every year, more than 12 million people visit Austin to enjoy its distinctive blend of natural beauty, dynamic industry, and world-class musical performances.
It’s no surprise that Austin was chosen as Texas’ capital, taking over the seat of state government from Houston in 1839. Ironically, Austin is also home to a boisterous environmentalists, who flock to this artsy town, alongside musicians seeking stardom. Tourists visiting Austin will notice the city’s ever-present spirit of artistic expression, from the 100s of live music venues to the South By Southwest Conference, which each March showcases starry-eyed bands to equally optimistic record executives.
Unlike its fast-paced northern siblings, Dallas and Houston, Austin Texas retains a relaxed, small-town atmosphere. Austin is now the fourth largest city in Texas, with a population of over 500,000 people spread across 218 square miles. Austin happily supports both cultures, much to the pleasure of modern professionals and outdoor enthusiasts. Austin is often referred to as the Texas version of Silicon Valley because it is home to many of the largest players in the high-tech industry. Tourists flock to Austin every year to enjoy the natural limestone pool at Barton Springs, the exotic gardens of Zilker Park, and the numerous hiking and biking trails.
Dallas
At slightly more than 1 million inhabitants, Dallas is now the 7th-largest city in the United States, but, flat and featureless, it has little in the way of natural gifts or historical precedents that would have predicted its growth. Dallas is the top business and leisure destination in Texas (and the second most popular convention site in the country).
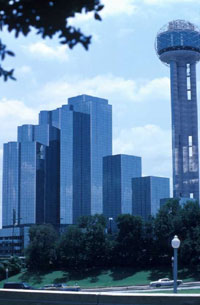
Dallas, nicknamed “Big D” because of its larger-than-life personality, has a strong tradition of pride. Dallas receives approximately 14 million visitors per year, making it the most popular vacation destination in Texas and the second most popular convention city in the United States. Given its current size and prominence, it’s difficult to believe that Dallas, Texas, arose from barren prairie land in the mid-nineteenth century. Dallas, which began as a trading post in 1841, grew quickly to become a major center for banking, finance, and oil. Tourists visiting Dallas today are immediately struck by its soaring skyscrapers, modern architecture, and vibrant shopping culture. After all, Dallas, Texas, is the birthplace of Neiman Marcus and the world’s largest wholesale market.
Dallas is currently the ninth largest city in the United States, with 1.1 million people spread across 330 square miles. Make no mistake: Dallas is a massive city in a massive state, with a massive sense of pride to match. Dallas, glitzy and modernistic, is surrounded by old money from cattle, oil, and finance. Although business trips and conventions account for the majority of all travel to Dallas, leisure travelers will find plenty to keep them entertained. Sports fans who visit Dallas, in particular, will not be disappointed. The Texas Motor Speedway, rodeos, and franchises in nearly every professional sport, including the notoriously hotheaded Cowboys, are all located in Dallas.
Use this online directory to begin planning your travel to Dallas. Discover the proud legacy that draws vacationers by the millions to the city of Dallas, Texas.
Houston
If you had to characterize Houston in a single word or phrase, it would be “wide open.” Situated on a flat, near featureless Gulf Coast plain, Houston sprawls from its center in vast tracts of subdivisions, freeways, office parks, and shopping malls. This is, after all the home of the Astrodome, billed originally as “the eighth wonder of the world,” the first of the dome stadiums.

Houston, Texas, is built on raw energy, thanks to its thriving oil and gas industry. Although business and convention travel account for the majority of Houston visitors, vacationers come to enjoy the city’s fine arts, unusual architecture, and vibrant nightlife. It’s almost ironic that this city served as the command center for the first manned mission to the moon, given that Houston was virtually uninhabited until the nineteenth century. In fact, despite Houston’s jagged ultramodern skyline, visitors can still get a sense of the flat, marshy terrain upon which the city was built. It wasn’t until 1837 that a pair of New Yorkers founded Houston in the hopes of making it the state capital. Despite the fact that the state government was awarded to Austin in 1841, Houston has exploded into an industrial powerhouse, fueled in large part by the oil boom.
Houston, Texas is the fourth most populous city in the United States, with 1.8 million people spread across 570 square miles. In terms of size, however, Houston comes in second, covering more than half of the state of Rhode Island. Houston, with its steady influx of newcomers and immigrants, is becoming more cosmopolitan and diverse. Throughout the year, tourists flock to Houston to enjoy its almost always sunny skies and temperatures that hover around 70 degrees Fahrenheit. Houston, also known as the Bayou City, is home to many of the largest players in the high-tech industry. Nonetheless, tourists flock to Houston each year to enjoy the natural limestone pool at Barton Springs, the exotic gardens of Zilker Park, and the numerous hiking and biking trails.
Use this online directory to begin planning your travel to Houston. Discover the natural wonders and cultural thrills that draw vacationers by the millions to the city of Houston, Texas.
San Antonio
Call it the Fiesta City or the Alamo City; each of San Antonio’s nicknames reveals a different truth. Visitors come here to kick back and party, but they also come seeking Texas’s history–and some would say its soul. They come to sit on the banks of a glittering river and sip cactus margaritas, but also to view the Franciscan missions that rose along the same river more than 2 1/2 centuries ago.
 As the site of the world-famous Alamo, the city of San Antonio, Texas, carries one of the Lone Star State’s most cherished legends. San Antonio, founded in 1691 by Franciscan missionaries, grew from an official military stronghold known as “Mission San Antonio de Valero” in 1718, later renamed “the Alamo.” Every year, approximately 2.5 million people visit San Antonio to “remember the Alamo” as a memorial to the 189 soldiers who died defending it from 4,000-plus Mexican invaders during the 1836 Texas Revolution, in a twist on its beloved epitaph. Although the Alamo remains the city’s most popular attraction, it is far from the only reason for tourists to visit San Antonio. Another 5.5 million people visit San Antonio with other plans each year, making it the state’s most popular leisure destination. San Antonio has earned the moniker “Fiesta City” in recognition of its festive spirit.
San Antonio, Texas, is the ninth largest city in the United States, with 1.1 million residents spread across 417 square miles. San Antonio, in stark contrast to the typically barren Southwest, is built on rich countryside nourished by its sparkling river. Visitors to San Antonio frequently enjoy strolling through its lively, winding downtown streets. San Antonio, as a crossroads of many cultures and ethnicities, offers a diverse range of cuisine, music, and entertainment. Despite its diversity, tourists visiting San Antonio will notice a strong Spanish influence.
Use this online directory to guide your travel to San Antonio. Discover the proud history and present thrills that draw tourists by the millions to the city of San Antonio, Texas.